Creating a one-off scheduled event
Table of contents
Introduction
One-off scheduled events are used to reliably trigger an HTTP webhook to run custom business logic at a particular point in time. For example, you can create a scheduled event to send a reminder email two weeks after a user signs up.
To add a one-off scheduled event, follow these steps:
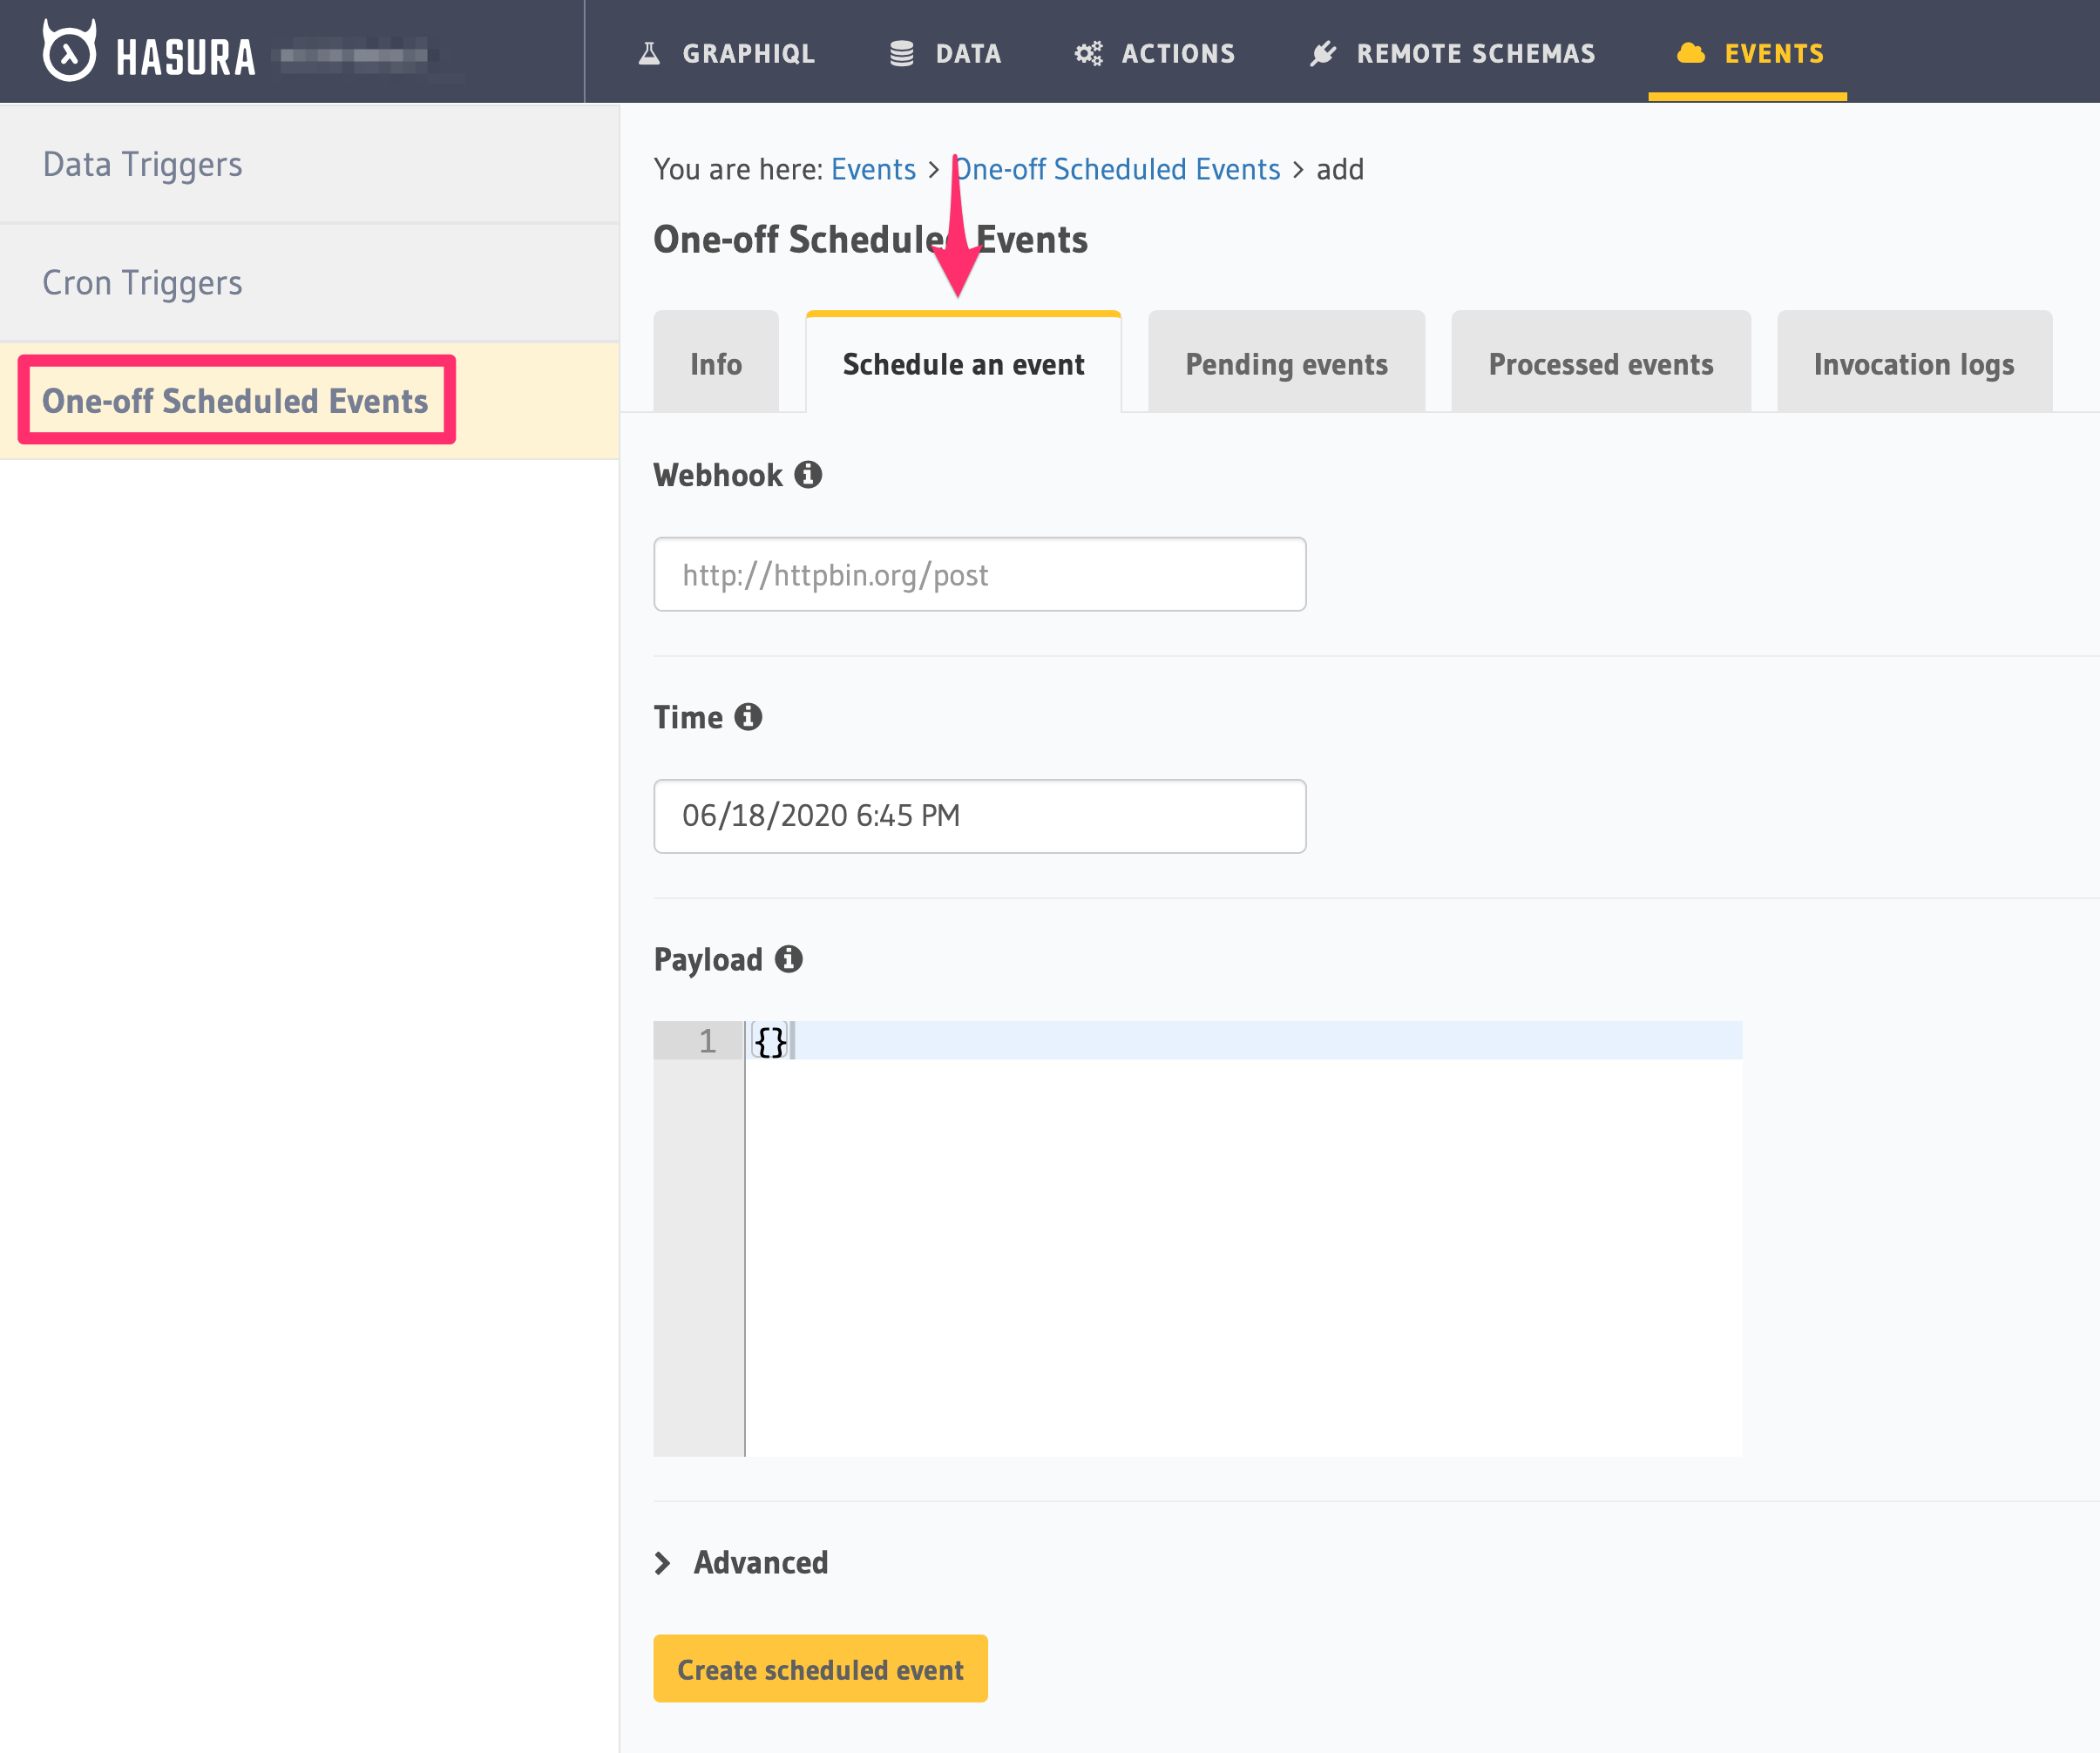
Step 1: Navigate to One-off Scheduled Events
- Go to the
Eventstab in your Hasura console. - Click
One-off Scheduled Events. - Click
Schedule an event.
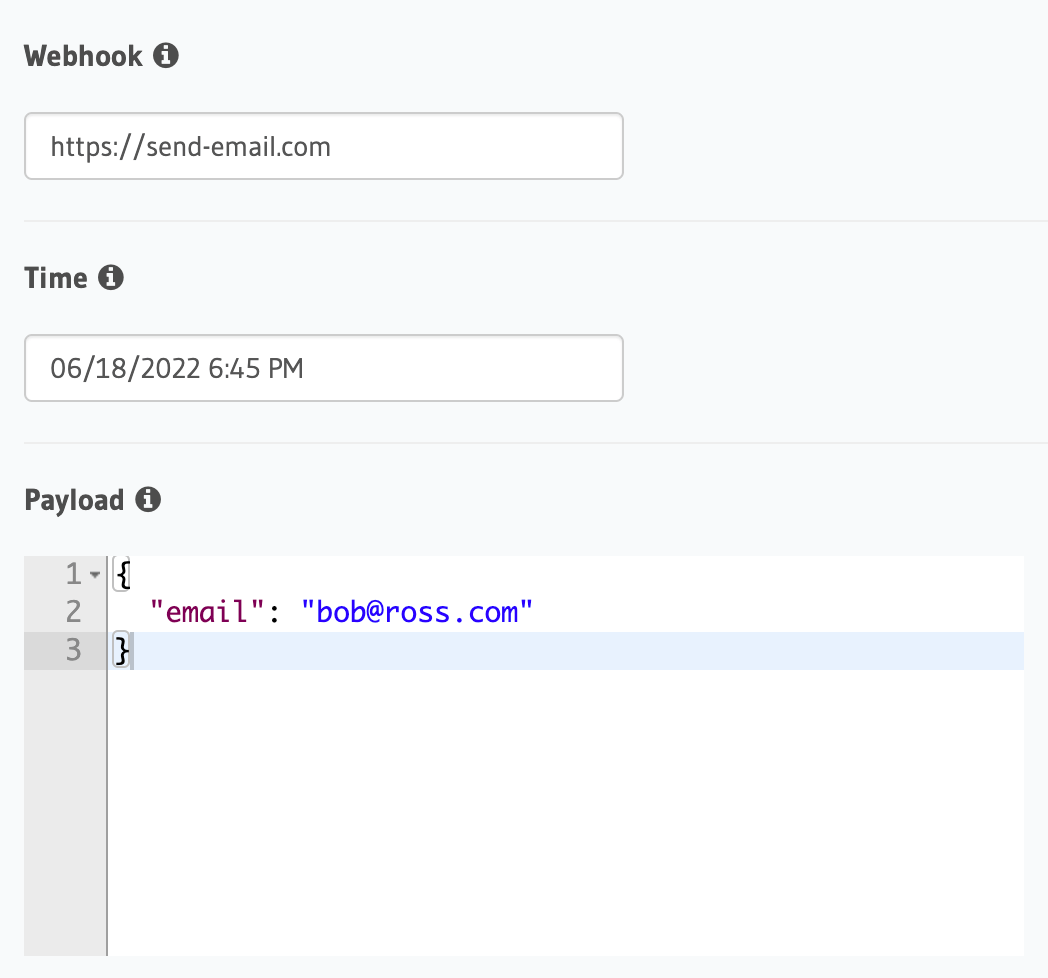
Step 2: Define the scheduled event
Define the following values for a scheduled event:
- Webhook: Enter the HTTP endpoint that should be triggered.
- Time: Enter the time to trigger the event.
- Payload: The JSON payload which will be sent to the webhook.
In the form opened by the above step, fill out the following fields:
You can define a scheduled event via the create_scheduled_event metadata API:
POST /v1/query HTTP/1.1
Content-Type: application/json
X-Hasura-Role: admin

{
   "type": "create_scheduled_event",
   "args": {
      "webhook": "https://send-email.com",
      "schedule_at": "2022-06-18T18:45:00Z",
      "payload": { "email": "bob@ross.com" }
   }
}
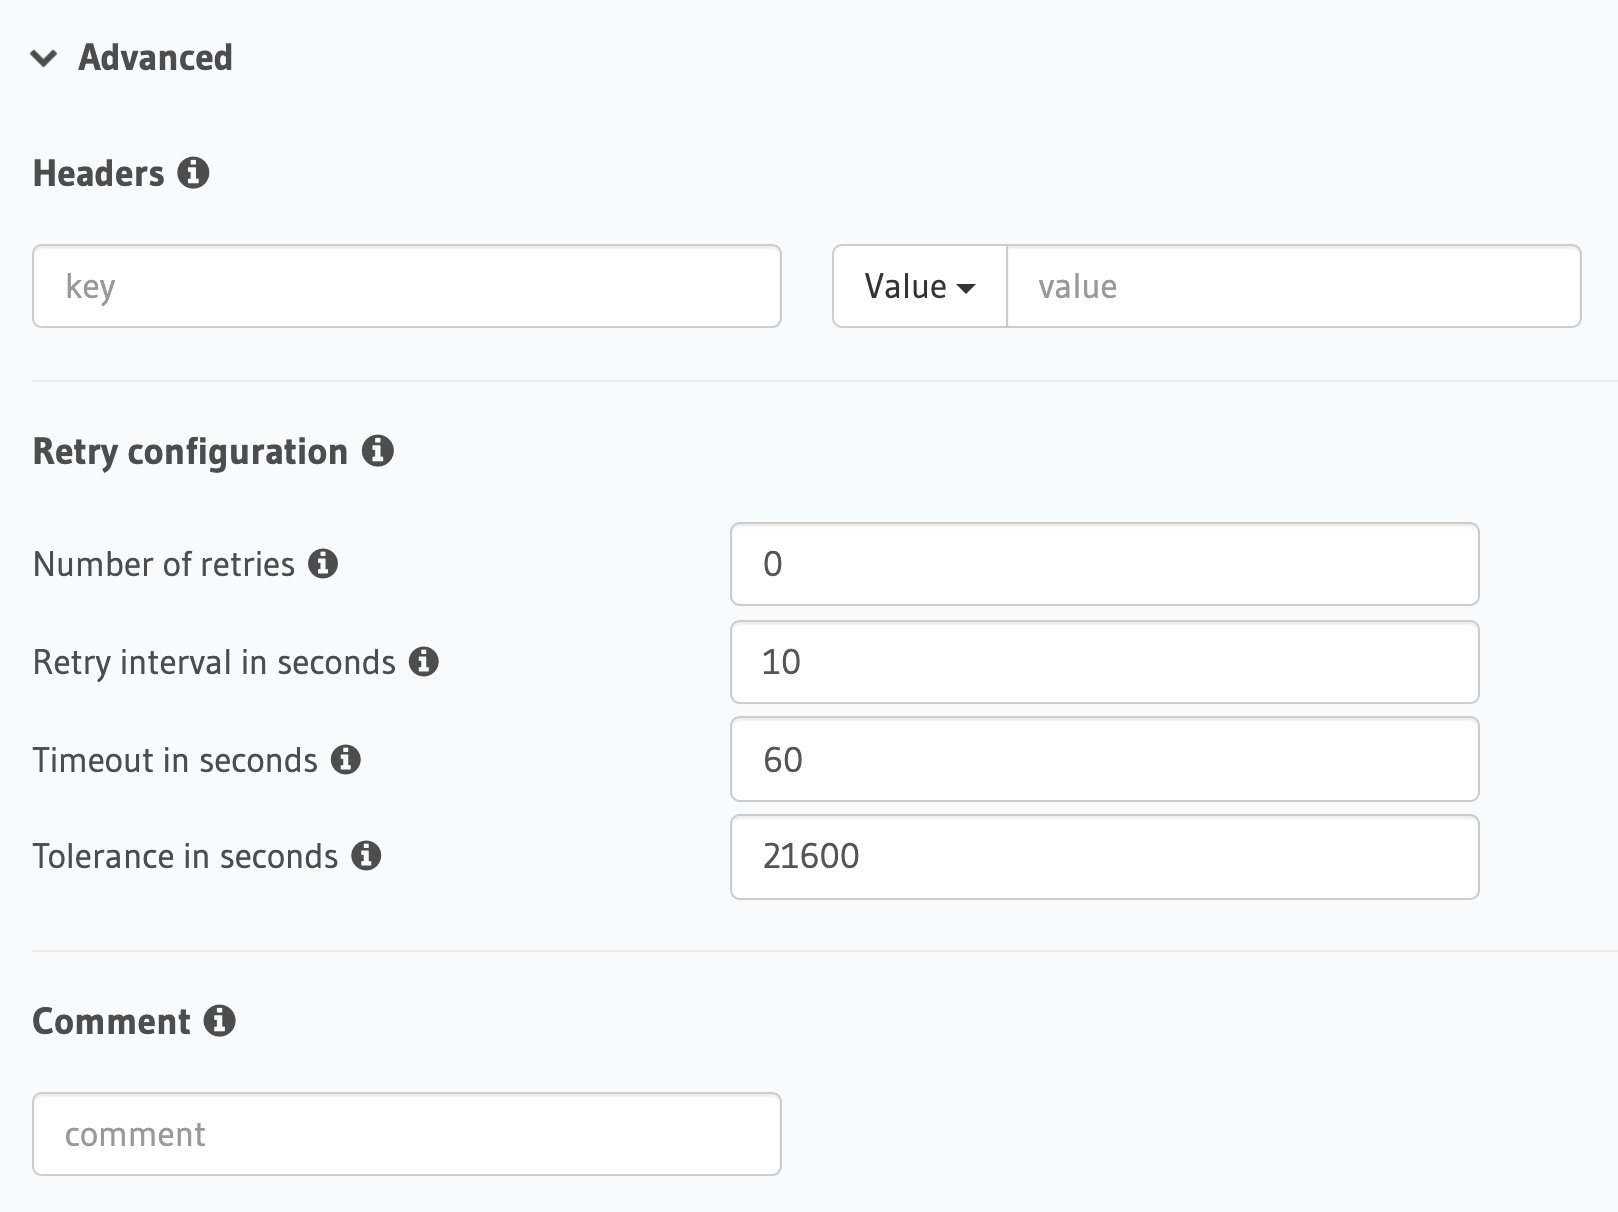
Step 3: Define advanced options (Optional)
If you like, you can also define advanced values:
- Headers: List of headers to be sent to the webhook.
- Retry configuration: In case the call to the webhook fails.
- Comment: Custom description of the scheduled trigger.
Expand the Advanced section.
You can define advanced options when defining a scheduled event via the create_scheduled_event metadata API:
POST /v1/query HTTP/1.1
Content-Type: application/json
X-Hasura-Role: admin

{
   "type": "create_scheduled_event",
   "args": {
      "webhook": "https://send-email.com",
      "schedule_at": "2022-06-18T18:45:00Z",
      "payload": {
            "email": "bob@ross.com"
      },
      "headers": [
            {
               "name": "key",
               "value": "value"
            }
      ],
      "retry_conf": {
            "num_retries": 3,
            "timeout_seconds": 120,
            "tolerance_seconds": 21675,
            "retry_interval_seconds": 12
      },
      "comment": "sample scheduled event comment"
   }
}
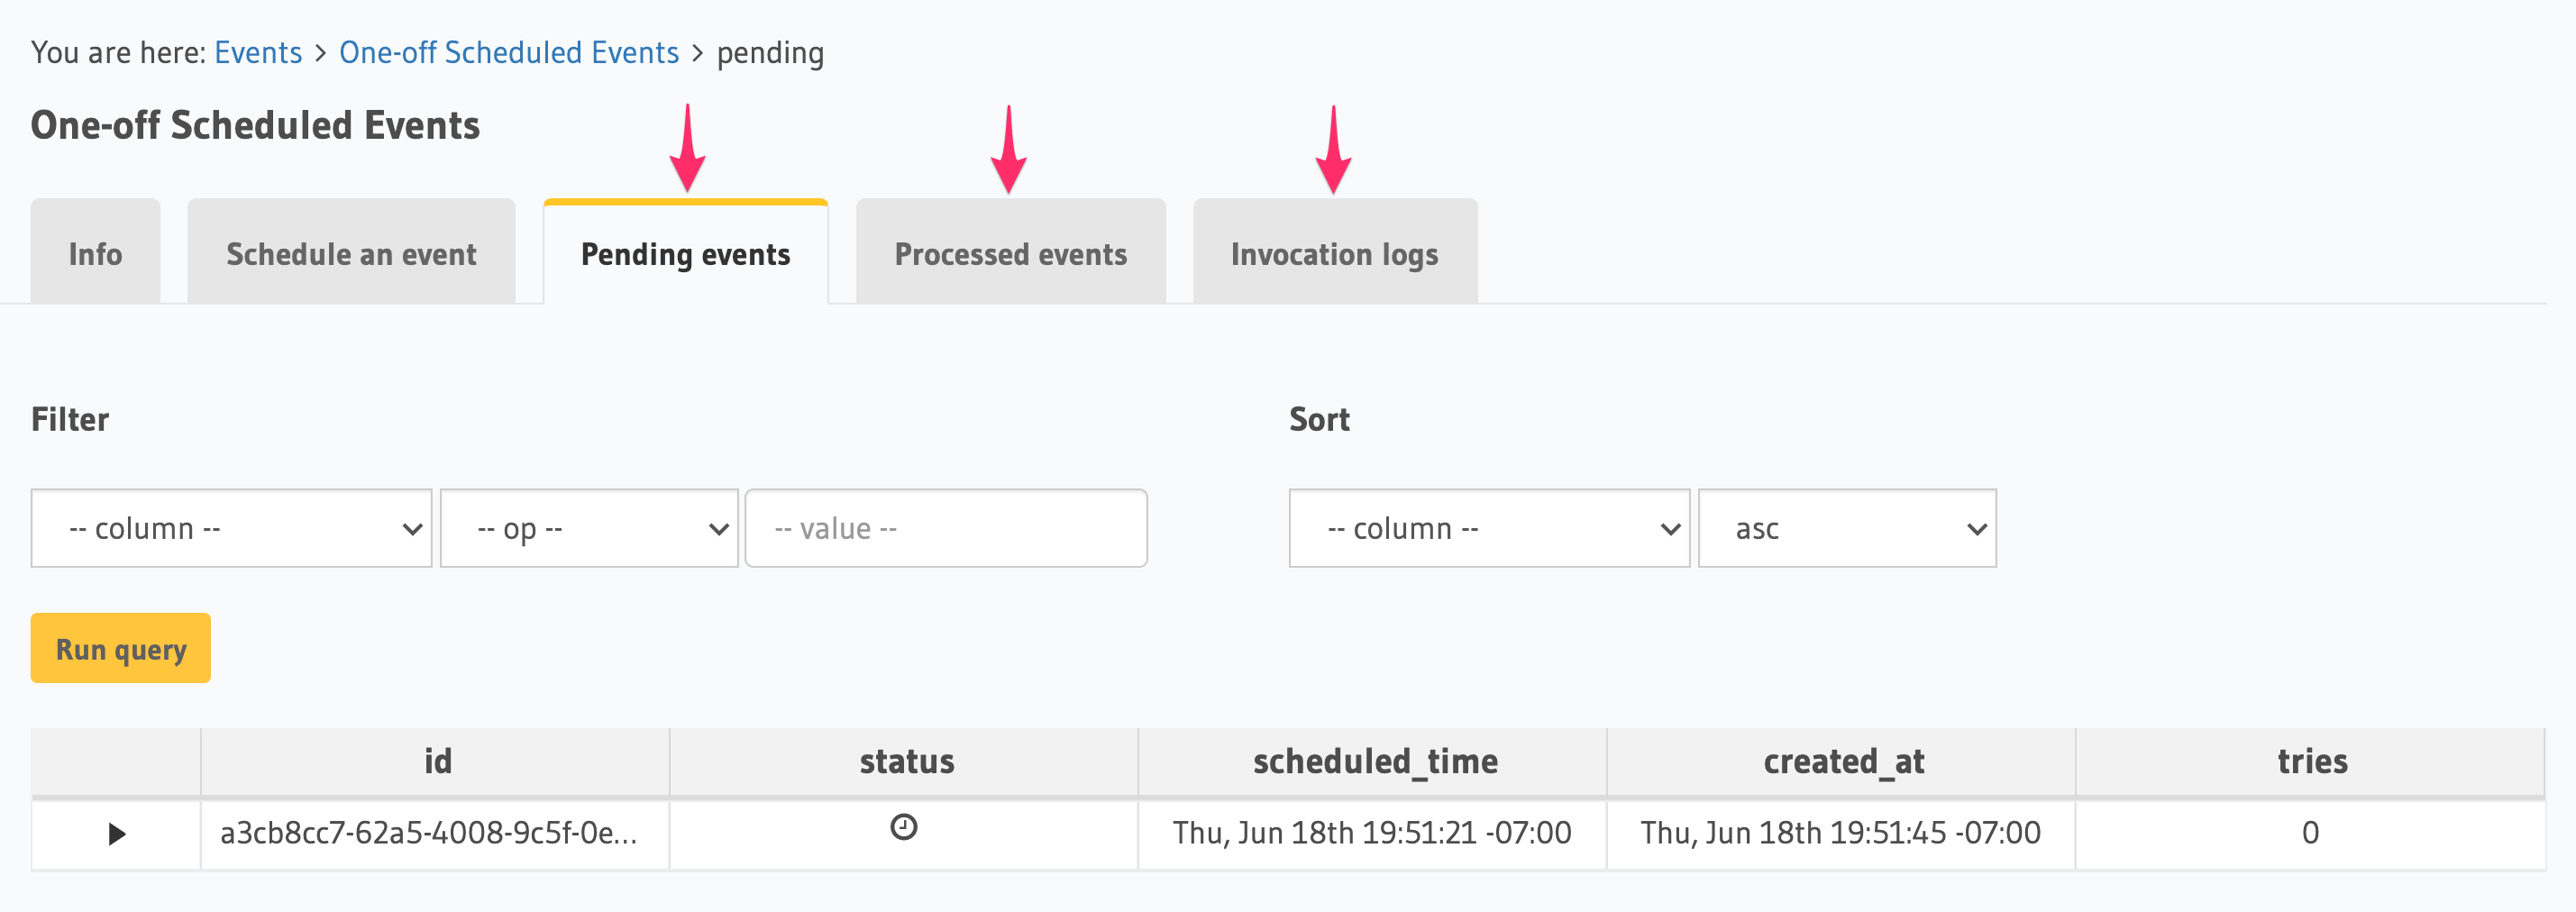
Schedule & logs
Once you’ve created your scheduled trigger, you can see Pending events, Processed events, and Invocation logs in their respective tabs.